


Semantic-Tag와 함께 SEO 향상을 위해 meta tag를 프로젝트에 적용하면서 meta tag의 역할과 기능, 그리고 Vue.js에서는 meta tag를 동적으로 어떻게 변화시킬 수 있는지 알아보자.
Meta tag?
<meta>는 <head>안에서 사용하는 meta data를 설정하기 위한 태그다. 여기서 meta data란, 데이터를 설명하는 데이터다.
meta data를 정의하면 브라우저나 검색 엔진, 다른 웹 서비스에서 해당 웹 페이지에 대한 meta data를 토대로 분석, 페이지 최적화의 용도로 사용하게 된다. 실제 페이지에는 보이지 않고 검색 엔진에서 읽히는 하나의 헤더다. SEO에 신경 써야 하는 페이지들은 필수로 적용되어 있다.
F12를 눌러 개발자 도구를 켠 후 Element 탭에서 <head> 태그를 펼쳐보자. 그러면 <meta …> 이라고 정의된 태그들이 있을 것이다. 이 녀석들은 검색 엔진에게 meta 정보를 넘겨주면서 SEO에 도움을 주게 되는 원리인 것이다.
우선 vue-meta를 적용하기 전 HTML <meta>태그를 읽고 오면 meta tag에 대한 전반적인 사용법에 대해 알 수 있을 것이다.
vue-meta 모듈
기본 개념
Vue.js는 SPA로 페이지가 단 한 개뿐인 웹 어플리케이션이다. SSR 방식이었다면 페이지를 이동할 때마다 새로운 페이지를 불러오기 때문에 페이지마다 <meta> 를 새로 정의해 주면 웹 크롤러가 알아서 정보를 수집했을 것이다.
따라서 vue에서 vue-router로 페이지를 이동하면서 동적으로 <meta> 를 변화시켜 주어야 했다. 어떻게 적용시킬 수 있을지 찾다가 vue-meta 라는 npm 모듈을 발견했다. react 진영에서는 react-helmet이 이 역할을 한다고 알고 있다.
함께 적용해 보자. 자세한 정보는 vue-meta 공식 홈페이지를 참고했다.
설치
$ npm install vue-meta --savemain.js에 적용
main.js에 적용시켜주면 된다.
// main.js
(...)
import Meta from 'vue-meta';

Vue.use(Meta);
Vue.use(Meta, { ... }) 이 사이에 몇 가지 옵션을 지정해줄 수 있다.
- keyName : String 형식, component에서 meta를 지정해 줄 때 keyName에 지정된 이름으로 부를 수 있다.
- attribute : String 형식, 실제적으로 meta 태그에 vue-meta를 관리한다는 attribute를 구분 값으로 심어준다.
- tagIDKeyName : String 형식, 이 구분 값으로 meta 태그를 새로 만들어 쌓는 게 아니라 name에 따라 meta 태그를 변화시킴
아래는 default 값이다.
Vue.use(Meta, {
  keyName: 'metaInfo',
  attribute: 'data-vue-meta',
  ssrAttribute: 'data-vue-meta-server-rendered',
  tagIDKeyName: 'vmid', // 변화시키는 구분 값
  refreshOnceOnNavigation: true,
});
컴포넌트에 적용
간단하게 적용해 보자.
// Component.vue
{
  metaInfo: {
    title: 'Tripllo',
    meta: [
      { charset: 'utf-8' },
      { name: 'viewport', content: 'width=device-width, initial-scale=1' }
    ],
  },
}
컴포넌트에 위와 같이 적용하면,
<!-- Rendered HTML tags in your page -->
<title>Tripllo</title>
<meta charset="utf-8" />
<meta name="viewport" content="width=device-width, initial-scale=1" />
이렇게 적용이 되는 구조이다. 즉, 컴포넌트 별로 metaInfo 를 정의해주면 meta 태그가 변하는 구조.
프로젝트에 적용
index.html
이제 실제로 적용해 보자. 먼저 public/index.html 이다. 클라이언트가 브라우저에 렌더링 되기 전 가장 먼저 받는 html 파일이다. 기본적인 틀, <head> 그리고 <body> 안에 <div id=“app”></div>만 있다.
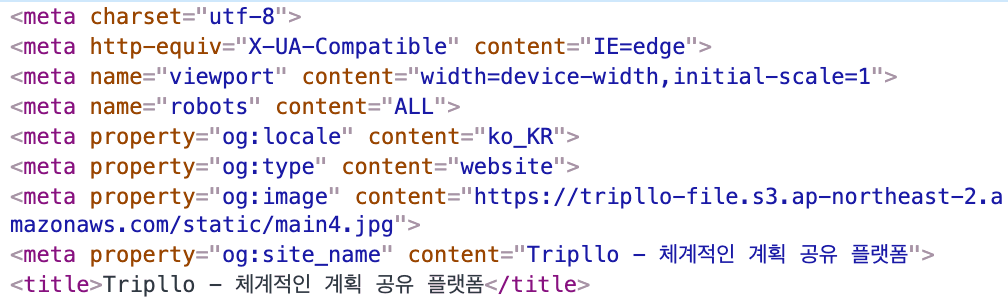
따라서, 변하지 않을 meta 태그를 미리 작성해두도록 하자.
<header>
  <meta charset="utf-8" />
  <meta http-equiv="X-UA-Compatible" content="IE=edge" />
  <meta name="viewport" content="width=device-width,initial-scale=1.0" />
  <meta name="robots" content="ALL" />
  <meta property="og:locale" content="ko_KR" />
  <meta property="og:type" content="website" />
  <meta
    property="og:image"
    content="https://tripllo-file.s3.ap-northeast-2.amazonaws.com/static/main4.jpg"
  />
  <meta property="og:site_name" content="Tripllo - 체계적인 계획 공유 플랫폼" />

  <title>Tripllo - 체계적인 계획 공유 플랫폼</title>
</header>
이곳에 적어준 녀석들은 <title> 을 제외하고 전부 변하지 않을 녀석들이다. og:image 같은 녀석들은 동적으로 처리해 줘도 좋을 것 같다.
App.vue
import { defualtMeta } from '@/utils/meta';

export default {
  metaInfo: {
    meta: defualtMeta,
  },
  (...)
};
위에서 봤던 metaInfo 다. App.vue는 전체 어플리케이션의 Base이므로 여기에 동적으로 변할 <meta> 의 default 값을 정의해두자.
utils/meta.js
export const defualtMeta = [
  {
    vmid: 'description',
    name: 'description',
    content: 'Tripllo를 통해 체계적으로 계획을 공유하고 다양한 컨텐츠를 만나보세요',
  },
  {
    vmid: 'keywords',
    name: 'keywords',
    content: 'Tripllo,계획공유,칸반보드',
  },
  {
    vmid: 'author',
    name: 'author',
    content: 'pozafly',
  },
];
크게는 description, keywords, author를 변화시킬 것이다. index.html에 기존에 절대 바뀌지 않을 값을 설정해 두었는데 왜 또 App.vue에 default meta 를 정의해두는지 궁금할 것이다.
- index.html 에서 고정적으로 넣었던 태그
- App.vue에 default 값으로 넣었던 태그
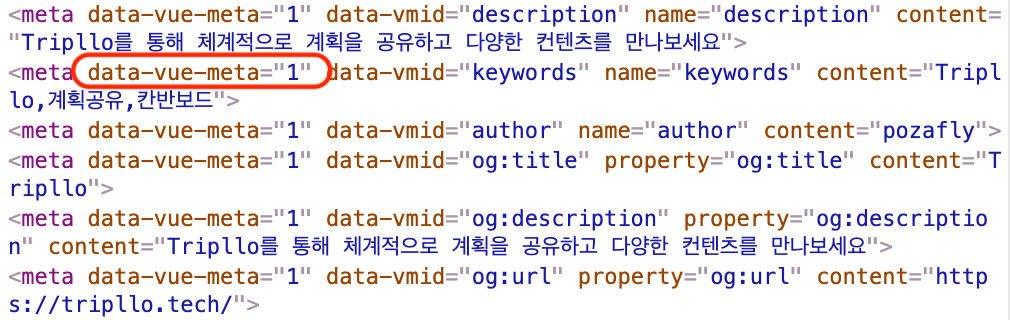
자세히 보면, App.vue에 넣었던 태그는 data-vue-meta 라는 녀석이 붙어있다. 가장 처음 Vue에 vue-meta를 적용할 때 main.js에 옵션을 넣을 수 있는 곳이 있었다. 그곳에 attribute 를 정의할 수 있었는데 그곳의 디폴트 값은 아래와 같았다.
Vue.use(Meta, {
  attribute: 'data-vue-meta', // 안 적어 줘도 default로 data-vue-meta 임.
});
attribute 값으로 vue-meta에서 관리하겠다고 지정해 주는 역할을 한다.
만약에 index.html에서 attribute가 붙지 않은 태그가 생성되었다고 가정하고, App.vue 혹은 컴포넌트에서 meta 태그를 변화시켰다면, 기존의 index.html의 meta 태그가 변하는 것이 아니라, data-vue-meta 가 붙은 새로운 meta 태그가 생성되게 된다.
따라서 위와 같이 index.html에 적어준 meta 태그는 아예 고정적인 녀석이고, App.vue에 default로 넣어준 녀석은 변화될 녀석인 것.
고유한 메타 데이터
App.vue에서 미리 default meta 태그를 지정해 준 이유는 바로 고유한 메타 데이터 때문이다. utils.meta.js 에 보면, vmid 이 녀석이 붙어 있다. 이 녀석은 메타 데이터를 고유하게 만들어준다. 예를 들어 description 은 모든 페이지에 대해 고유해야 하기 때문에 겹치면 안 된다. vmid 를 지정해 주지 않으면,
// parent component
{
  metaInfo: {
    meta: [{ charset: 'utf-8' }, { name: 'description', content: 'foo' }];
  }
}
// child component
{
  metaInfo: {
    meta: [{ name: 'description', content: 'bar' }];
  }
}<meta charset="utf-8" />
<meta name="description" content="foo" />
<meta name="description" content="bar" />이렇게 겹쳐서 나오게 된다. 이 때 vmid 를 지정해 주었을 때를 보자.
// parent component
{
  metaInfo: {
    meta: [{ charset: 'utf-8' }, { vmid: 'description', name: 'description', content: 'foo' }];
  }
}
// child component
{
  metaInfo: {
    meta: [{ vmid: 'description', name: 'description', content: 'bar' }];
  }
}<meta charset="utf-8" /> <meta data-vmid="description" name="description" content="bar" />이런 식으로 나오게 된다. 즉, 1개의 description 이 나오게 되는 것이다. 이 vmid 는 main.js에서 옵션으로,
Vue.use(Meta, {
  tagIDKeyName: 'vmid', // 안 적어 줘도 default로 vmid임.
});
이 녀석으로 이름을 정해줄 수 있다.
컴포넌트에서 적용
metaInfo() {
  return {
    title: this.board.title,
    titleTemplate: '%s | Tripllo',
    meta: [
      {
        vmid: 'description',
        name: 'description',
        content: this.makeContent,
      },
      {
        vmid: 'keywords',
        name: 'keywords',
        content: this.makeContent,
      },
      {
        vmid: 'author',
        name: 'author',
        content: this.user.id,
      },
      {
        vmid: 'og:title',
        property: 'og:title',
        content: this.board.title,
      },
      {
        vmid: 'og:url',
        property: 'og:url',
        content: `${process.env.VUE_APP_API_URL}/board/${this.board.id}`,
      },
    ],
  };
},
하나의 예시를 가져왔다. 잘 보면, metaInfo: { ... } 형식이 아니라, metaInfo() { return { ... } } 형식이다.
왜냐하면, content에 들어갈 녀석들은 component script 부분에서 연산이 일어난 후 붙어야 하기 때문이다.
이런 식으로 동적으로 meta 태그를 정의할 수 있게 되었다.
읽어보면 좋을 링크를 가져왔다.